REVIEW · COPENHAGEN
Copenhagen City Of Lights PhotoWalks Tour
Book on Viator →Operated by Better Moments Photo Exploring · Bookable on Viator
Streetlights change everything after sunset. This is a private photo walk that teaches you how to shoot Copenhagen when the sky turns moody and the lights finally switch on. I love the way the professional photography guide stays fully focused on your questions, plus the fact that you get practical instruction on camera settings, composition, and long-exposure technique.
One heads-up before you pack your gear: this tour timing aims for the blue hour into night, but in Copenhagen the city can stay bright late. If you are hoping for deep darkness, plan for the possibility of a lighter-than-expected sky, and know you’ll need patience while you dial in your settings.
In This Review
- Key things I’d prioritize before you go
- What this Copenhagen night photo walk is really about
- Price and value: is $233.63 worth it?
- Where you start and how the 3-hour flow works
- Stop-by-stop: Nyhavn, the Queen’s Palace area, Opera House, and Parliament
- Nyhavn with lights on: water, color, and reflections
- The Queen’s Palace area: architecture meets controlled light
- The Opera House: high-impact modern shapes
- Parliament: night contrast and longer-exposure payoff
- The photography lesson you actually get (not just random tips)
- The tripod requirement: your make-or-break item
- Timing reality check: blue hour can be brighter than you expect
- Weather and comfort: built for real Copenhagen conditions
- Who this tour suits best
- Practical tips so you get better results fast
- Should you book the Copenhagen City of Lights PhotoWalks Tour?
- FAQ
- How long is the Copenhagen City of Lights PhotoWalks Tour?
- Is this a private tour?
- What language is the tour offered in?
- Where does the tour start and end?
- Do I need a tripod?
- What photography topics are covered during the walk?
- Which landmarks will we photograph?
- Does the tour run in bad weather?
- Is admission included?
- What is the cancellation policy?
Key things I’d prioritize before you go
- Blue hour to lights-on timing for photos that feel cinematic without being pitch-black.
- Private, personalized coaching so you’re not guessing or waiting your turn.
- Manual settings practice (aperture, shutter speed, ISO) tied to real scenes you’re photographing.
- Composition guidance using perspective, lines, and color so your images look intentional.
- Tripod required for the longer exposures that night photography needs.
- Classic Copenhagen photo targets like Nyhavn, the Queen’s Palace area, the Opera House, and Parliament—ending near Kongens Nytorv.
What this Copenhagen night photo walk is really about
Copenhagen is gorgeous by day, but the best photos often happen when the light starts misbehaving. This tour is built around that moment: just before sunset fades, when you’re between the blue hour and full night, and the city changes character.
You are not just going for scenic sightseeing with your camera. You’re learning why night photos look the way they do, and how to control the camera instead of letting it control you. That makes a big difference if you’ve ever come back from a trip with lots of dark, blurry images and a feeling that the camera should have done more.
The “private” part matters too. In a group, you might lose time to traffic, gear issues, or confusion. Here, your guide can focus on what your camera needs right now—how to frame it, what settings to try, and what to watch for in the light.
Other walking tours we've reviewed in Copenhagen
Price and value: is $233.63 worth it?
At $233.63 per person, this is not a budget casual stroll. You’re paying for three things that actually cost time and expertise: a private photography guide, instruction that’s tied to specific scenes, and the hands-on guidance for night settings.
Here’s how I’d think about value:
- If you already own a camera and want to improve fast, the payoff can be high because you get direct feedback in real lighting conditions.
- If you’re the type who learns best by doing, this is the right format. Night photography is one of those skills where reading alone won’t get you consistent results.
- If you’re traveling in a small group, the pricing can feel more reasonable because the tour can include you plus up to 3 friends or family members in the private experience (included in the price).
One more thing: the tour includes a professional photographer guide and the focus is on getting photos you’ll want to keep. If that’s your goal, the cost starts to make sense quickly.
Where you start and how the 3-hour flow works
You begin at the Memorial Anchor, Nyhavn (near the water), and you end back near where you started, at the Metro station at Kongens Nytorv. The whole walk is about 3 hours.
That loop approach is smart for night photography. You get multiple chances to shoot different “lighting moods” in a single outing—water reflections near Nyhavn, architectural highlights around major buildings, and the glow-and-shadow contrast you only get once city lights are fully active.
The tempo is meant to be laid back, not a sprint. You’ll need that time because night shooting often takes trial-and-error: adjusting settings, checking focus, waiting for steadier results, and waiting for the scene to match the light you want.
Stop-by-stop: Nyhavn, the Queen’s Palace area, Opera House, and Parliament
The tour is structured as one main photo-walk segment, but the walk itself hits a set of big, photo-friendly Copenhagen sights. Here’s what to expect and why each one is a good target at night.
Nyhavn with lights on: water, color, and reflections
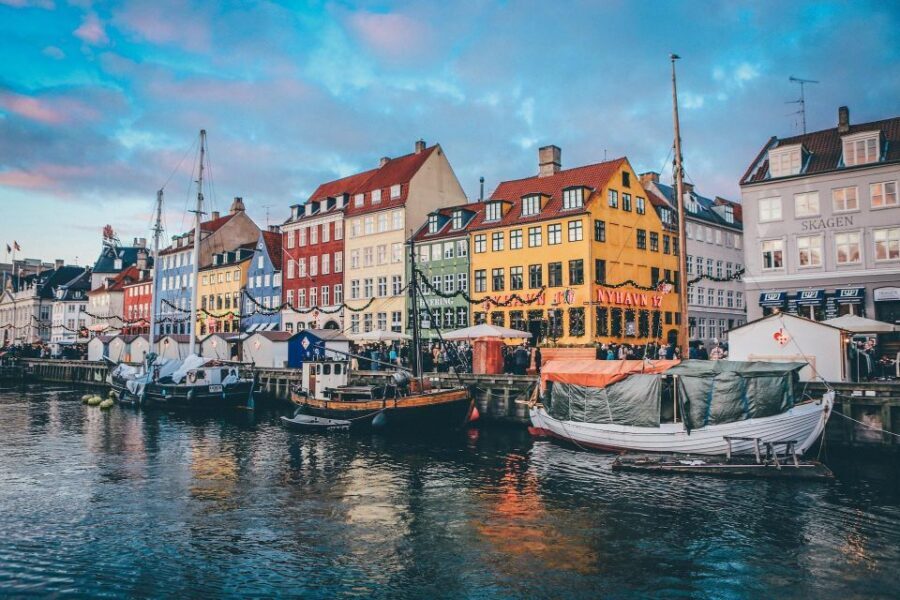
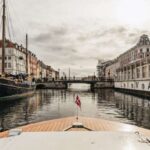
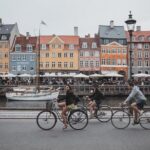
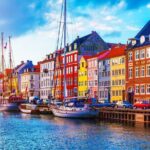
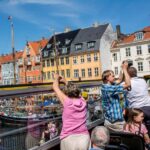
Nyhavn is the headline for a reason. You get classic old houses, strong light sources, and a lot of reflection opportunities. At night, those streetlights and building lights bounce off the water, creating layered color and texture.
What you’ll practice here:
- Composition that uses lines and perspective (shoreline geometry helps).
- Exposure decisions for highlights so bright windows and lamps don’t blow out.
- Framing that balances the foreground and the lit buildings behind.
Possible drawback: reflections can be messy if your camera settings are off. That’s exactly why the guide’s help is useful—you can learn what to change when the reflection looks too bright, too soft, or too streaky.
Other city tours we've reviewed in Copenhagen
The Queen’s Palace area: architecture meets controlled light
Shooting the Queen’s Palace area (as referenced on the tour) is a chance to practice night photography with a cleaner architectural feel than the harbor scene. Night lighting on grand buildings gives you clear shapes, strong vertical lines, and often a dramatic background.
What you’ll practice here:
- Using lines and symmetry without making the photo look stiff.
- Balancing aperture and shutter speed so the building stays sharp while the light looks smooth where you want it.
- How to read the light on stone and windows—some surfaces hold detail longer than others.
This is also a good stop for learning how to “see” the scene before you shoot. Your guide’s job is to help you spot the angles that make the light look intentional.
The Opera House: high-impact modern shapes
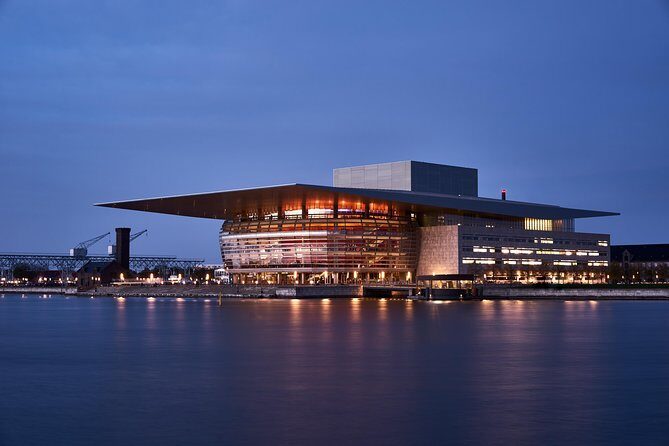
The Opera House is a major photo magnet, and at night it becomes even more graphic. You can get strong silhouettes, bright accents, and reflections if the nearby surfaces cooperate.
What you’ll practice here:
- Exposure control when you have bright points of light close to darker areas.
- Creative composition using color and contrast, especially when the background is more neutral.
- How to keep your framing from turning into a straight-on postcard. The guide can help you try different angles so the building feels like a story, not just a landmark.
If you are hoping for dramatic results, this is usually where things start clicking for people—once you see what the lighting does to shape and contrast.
Parliament: night contrast and longer-exposure payoff
The Parliament area gives you a different kind of challenge: more distant lighting, more highlight management, and a scene that rewards patience.
What you’ll practice here:
- Long shutter speeds in relation to the scene, so you learn what kind of motion blur looks good and what looks like a mistake.
- ISO and shutter speed tradeoffs to avoid overly noisy images.
- Techniques for timing your exposure so the final photo looks stable and deliberate.
Long exposures are why the tripod matters so much. If you’re holding the camera in place, you can’t really learn what the shutter speed is doing.
The photography lesson you actually get (not just random tips)
This tour is built around a clear set of skills. You’re not sent out with a vague suggestion to shoot at night. You’ll get coaching on the fundamentals that directly affect image quality.
Here’s what the guide helps you work on:
- Manual camera settings: aperture, shutter speed, and ISO
- Creative composition: perspective, lines, and color
- How light affects the final image (where you place yourself matters)
- Long shutter speed technique and why it works in night scenes
- Tips & tricks for post-processing (so you can finish the image after you get the shot)
A small but important detail: the tour is private, so you can ask questions when something isn’t working. Night photography often feels frustrating because results depend on tiny changes. Having someone help you interpret those changes beats trial-and-error alone.
The tripod requirement: your make-or-break item
The tour requires you to bring a tripod for longer exposures. That’s not a “nice to have.” It’s the tool that lets you capture night scenes as intended.
If you don’t travel with a tripod often, here are practical ways to be ready:
- Make sure you can set it up quickly and adjust it comfortably in public spaces.
- Be prepared for slower shooting moments. Night photography isn’t just point-and-shoot; it’s waiting for stable settings.
- Protect your camera from wind if it’s breezy. Tripods help, but only if they’re stable.
Yes, hauling a tripod is annoying. But it also means you’ll likely walk away with photos that look like you planned them, not like the camera gave up.
Timing reality check: blue hour can be brighter than you expect
The tour is designed for the period just before full night, and it’s described as a sunset-to-night style experience. One review flagged that the timing may feel off if Copenhagen stays light well after 10pm, meaning you might not get the full deep-night look during the walk.
Here’s how you can use that info:
- If your goal is dark skies and heavy light streaks, be flexible. You may still get strong photos from reflections and lit architecture even if the sky is not pitch-black.
- Plan to work with the light you get. A skilled guide helps you change settings based on what the sky and streetlights are doing right then.
The best part is that the instruction still applies. Even when the sky is brighter, you still learn exposure control and composition.
Weather and comfort: built for real Copenhagen conditions
The tour operates in all weather conditions. That means you should dress for the elements, because rain, wind, and cool air can affect both comfort and camera handling.
For me, this matters because night photography often takes longer than daytime. If you’re cold and distracted, you won’t learn as well and you won’t enjoy the walk as much.
Bring what you need so you can focus on the scene: a warm layer, waterproof outerwear if needed, and a way to keep your camera protected.
Who this tour suits best
This is a strong fit if:
- You want a real photography lesson rather than a sightseeing-only trip.
- You’re new to manual settings and want coaching that translates directly into better images.
- You’re more experienced and you want to practice longer exposures with feedback on exposure and composition.
- You want a private guide who can tailor help to your needs while you photograph landmarks like Nyhavn and major city buildings.
It may be less ideal if:
- You hate the idea of using a tripod.
- You only want quick snapshots with no effort toward settings.
- You want zero waiting and a strict pace, because night photography is slower by nature.
Practical tips so you get better results fast
Here are a few things that will help you make the most of your 3-hour walk.
- Start with a tripod you can set up quickly. If setup takes forever, you lose time learning.
- Expect to try more than one setting per scene. Night photos often need small adjustments.
- Watch for your highlights. City lights can overpower a sensor fast, so learning how to manage bright points helps a lot.
- Ask questions early. Night photography is easier once you understand the logic behind aperture, shutter speed, and ISO.
- Save time for post-processing basics. The tour includes tips & tricks, and a little cleanup can make the photo look finished.
Should you book the Copenhagen City of Lights PhotoWalks Tour?
I’d book it if you want night photos from Copenhagen that look thoughtful and controlled, not just dark pictures with lights in the background. The private setup is the big advantage: you get direct coaching on manual settings and composition, and you practice on the city’s most photogenic lighting scenes.
I’d hesitate only if you strongly need deep-dark skies and heavy night atmosphere at a specific time, or if you do not want to carry and use a tripod. Otherwise, the timing, the landmark selection, and the instruction focus make this a valuable way to turn Copenhagen’s lights into images you’ll be proud to keep.
FAQ
How long is the Copenhagen City of Lights PhotoWalks Tour?
The tour lasts about 3 hours.
Is this a private tour?
Yes. It’s a private experience where only your group participates. You can bring up to 3 friends or family members included in the price.
What language is the tour offered in?
It’s offered in English.
Where does the tour start and end?
It starts at Memorial Anchor, Nyhavn 1F, 1051 København, Denmark. It ends back near where you started, at the Metro station at Kongens Nytorv.
Do I need a tripod?
Yes. You are required to bring a tripod because the tour involves longer exposures.
What photography topics are covered during the walk?
You’ll get instruction on manual settings such as aperture, shutter speed, and ISO, plus composition using perspective, lines, and color, and guidance on the control of light and long shutter speeds. There are also tips for post-processing.
Which landmarks will we photograph?
You’ll have a chance to photograph Nyhavn, the Queen’s Palace, the Opera House, Parliament, and other important landmarks along the route.
Does the tour run in bad weather?
Yes. It operates in all weather conditions, so you should dress appropriately.
Is admission included?
Admission is listed as free.
What is the cancellation policy?
You can cancel for a full refund up to 24 hours in advance of the experience’s start time. If you cancel less than 24 hours before, the amount paid is not refunded.